Taming the Backyard Tangle: The Ultimate Guide to Shed Organization
The garden shed is often the unsung hero of the backyard. It stands stoically through rain and shine, housing our dirt-caked shovels, expensive power tools, and that bag of birdseed we forgot we bought last spring. However, because it’s "out of sight, out of mind," the shed quickly devolves into a chaotic dumping ground where finding a simple hand trowel feels like an archaeological dig.
If you’re tired of tripping over the lawnmower or playing a dangerous game of Jenga every time you reach for a bag of mulch, it’s time for a transformation. Organizing a garden shed isn’t just about neatness; it’s about protecting your investment in tools and making your time in the garden more therapeutic and less frustrating.
Phase 1: The Total Reset
You cannot organize around a mess. To truly reclaim the space, you must start with a blank canvas.
- The Evacuation: Pick a clear, dry day and take everything out. Seeing your shed empty allows you to inspect the structure for leaks, pests, or rot that might need fixing before you move back in.
- The Ruthless Sort: Categorize your items into three piles: Keep, Rehome (Donate/Sell), and Dispose. Be honest—if that gas trimmer hasn't started since 2022, it’s either time for the repair shop or scrap heap.
- Deep Clean: Sweep out the cobwebs, scrub any oil spills off the floor, and wipe down the shelves. A fresh-smelling, clean shed is much more inviting to maintain.
Phase 2: Inventory and Zonal Planning
Before you start putting things back, think about "flow." You want your most-used items to be the most accessible. Group your gear into logical zones:
- The Potting Station: Pots, soil, seeds, and watering cans.
- Long-Handled Tools: Rakes, hoes, shovels, and brooms.Power Equipment: Mowers, blowers, and edgers.
- Chemicals & Soil Builders: Fertilizers, pesticides, and bags of compost.
- Small Hand Tools: Pruners, trowels, and shears.
Phase 3: Mastering the Walls
In a small shed, the floor is for feet and heavy machinery only. Everything else should be airborne.
The Magic of Pegboards
Pegboards are the gold standard for small hand tools. By outlining your tools with a permanent marker on the board, you create a "shadow board." This provides an instant visual cue when a tool is missing and tells you exactly where it belongs when you're finished.
Magnetic Tool Strips
For metal items like trowels, pliers, and even metal-handled brushes, magnetic strips are a lifesaver. They keep tools visible and within arm’s reach, preventing them from getting lost in the bottom of a dark drawer.
Vertical Racks and Gravity Hooks
Don't just lean your rakes against the corner—they will invariably fall over like dominoes. Install a wall-mounted tool rack or simple "S" hooks. Storing long-handled tools vertically with the heads pointing up saves immense amounts of floor space and protects the edges of your shovels and hoes.
Cord-Tie
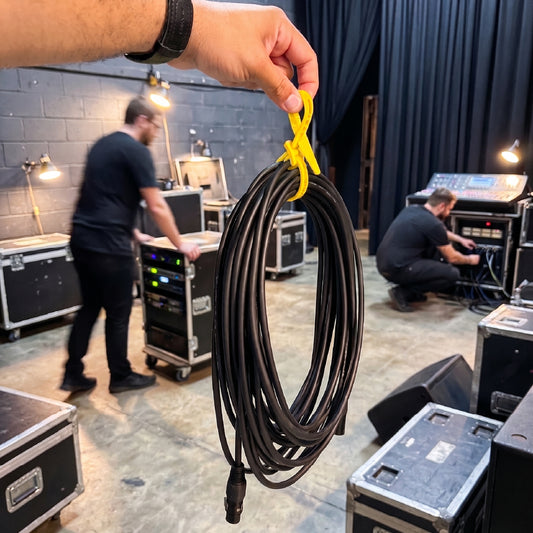
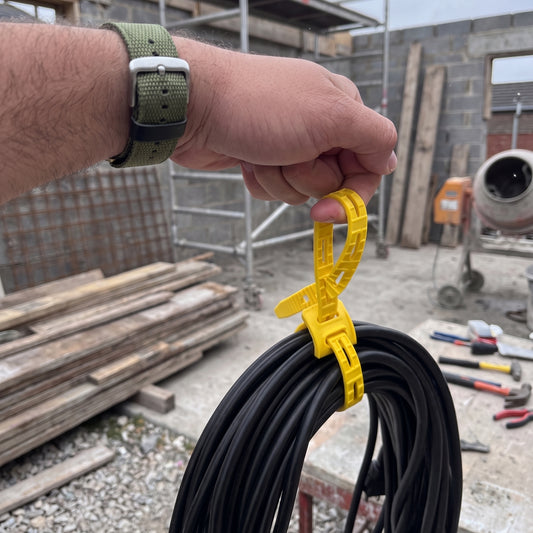
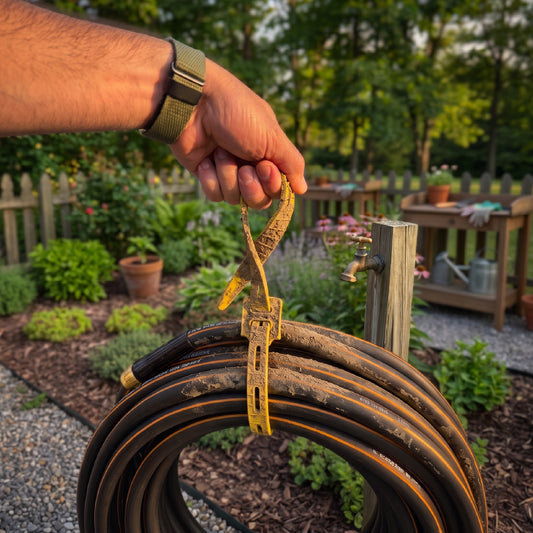
The common solutions like rope, zip ties, and hook-and-loop straps have their place, they also have too many limitations for garden use. Zip ties need to be cut off and degrade in the sun. Dirt, dust, and fuzz clog the fibers in hook-and-loop straps, so they don’t stick together very well. Rope can get cinched too tight and require a cut. A new product, Cord-Tie is a durable, reusable, and versatile tool that allows you to easily bundle things together. With its patented design, Cord-Tie holds up to dirt, fuzz, mud, and weather. And it has a built-in loop to enable you to hang things from cables, cords, hoses, gear, or lighting.
Phase 4: Creative Storage Solutions
Sometimes, the best organization tools aren't found in the hardware aisle.
- PVC Pipe Holsters: Cut short lengths of PVC pipe at an angle and screw them into the wall studs. These act as "holsters" for everything from rakes to screwdrivers.
- The Pot Stacking Trick: Use a vertical "pot rod"—a piece of rebar or a sturdy wooden dowel—to stack empty terracotta or plastic pots. It keeps them from toppling and saves shelf space.
Phase 5: Managing the Messy Stuff
Fertilizer bags and potting soil are notorious for leaking and attracting moisture.
- Galvanized Metal Bins: Transition opened bags of soil, birdseed, or grass seed into metal bins with tight-fitting lids. This keeps the contents dry and prevents rodents from treating your shed like a buffet.
- Floating Shelves: Install high shelves for items you use infrequently, such as holiday outdoor lights or extra rolls of weed barrier fabric.
- The Workbench: If space allows, a small fold-down workbench can give you a dedicated spot for repotting plants or repairing tool handles without having to hunch over on the floor.
The Golden Rule: Maintenance
A shed stays organized only if you respect the "Home Principle." Every single item, down to the last roll of twine, must have a designated home. When you finish a gardening session, resist the urge to just toss your gloves on the mower. Spend sixty seconds putting things back in their zones.
By treating your garden shed as a workshop rather than a closet, you create an environment that fuels your hobby rather than hindering it. When your tools are clean, sharp, and easy to find, the actual work of gardening becomes a joy. Now, go grab those work gloves and reclaim your space!